
Are you considering upgrading your home’s flooring to elevate its overall aesthetic appeal? One of the most transformative and captivating options is to replace your old carpet with stunning hardwood floors.
Not only does hardwood flooring add a touch of elegance to any space, but it also offers durability, easy maintenance, and a timeless charm that can enhance the value of your home.
In this article, we will guide you through the process of removing carpet and installing hardwood flooring, step by step.
Preparing for the Transformation
Before diving into the removal process, it’s essential to prepare adequately. Here are a few key steps to help you get started:
- Measure and Plan: Take accurate measurements of the room(s) where you plan to install hardwood flooring. This will help you estimate the amount of wood required and ensure a smooth transition from carpet to hardwood.
- Choose the Right Hardwood: Research different types of hardwood flooring to find the one that best suits your style preferences and budget. Whether you prefer classic oak, warm maple, or exotic Brazilian cherry, selecting the right hardwood will set the stage for a stunning transformation.
- Gather Tools and Materials: Make sure you have all the necessary tools and materials before beginning the removal process. This includes gloves, safety goggles, a pry bar, pliers, a utility knife, a dust mask, and a vacuum cleaner.
Removing the Carpet
Now that you’ve prepared for the transformation, let’s dive into removing that old carpet and preparing the subfloor for hardwood installation:
- Clear the Room: Remove all furniture, decorations, and other items from the room. This will give you ample space to work and prevent any potential damage.
- Begin with the Edges: Start by cutting away the carpet along one wall, about 6 inches from the edge. Use a utility knife to make a clean cut and then grab hold of the carpet and pull it up. Repeat this process along the remaining walls until all edges are free.
- Remove the Carpet Padding: If your carpet has padding underneath, carefully detach it from the floor using pliers or a pry bar. Roll up and dispose of both the carpet and padding responsibly.
- Tackle the Tack Strips: Tack strips are thin pieces of wood with sharp nails that hold the carpet in place along the edges. Using a pry bar or pliers, gently remove these strips from the floor. Exercise caution to avoid any injuries.
- Cleaning and Preparing the Subfloor: After removing the carpet and tack strips, thoroughly clean the subfloor to remove any debris or adhesive residue. Ensure that the subfloor is level and dry before proceeding with hardwood installation.
Installing Hardwood Flooring
With the carpet removed and the subfloor prepped, it’s time to bring in your new hardwood flooring and transform your space:
- Acclimate the Wood: Allow your hardwood flooring to acclimate to its new environment by leaving it in the room for at least 72 hours before installation. This helps prevent warping or shrinking after installation.
- Lay the Underlayment: Install an underlayment over your subfloor to provide moisture protection and improve sound insulation. Follow the manufacturer’s instructions for proper installation.
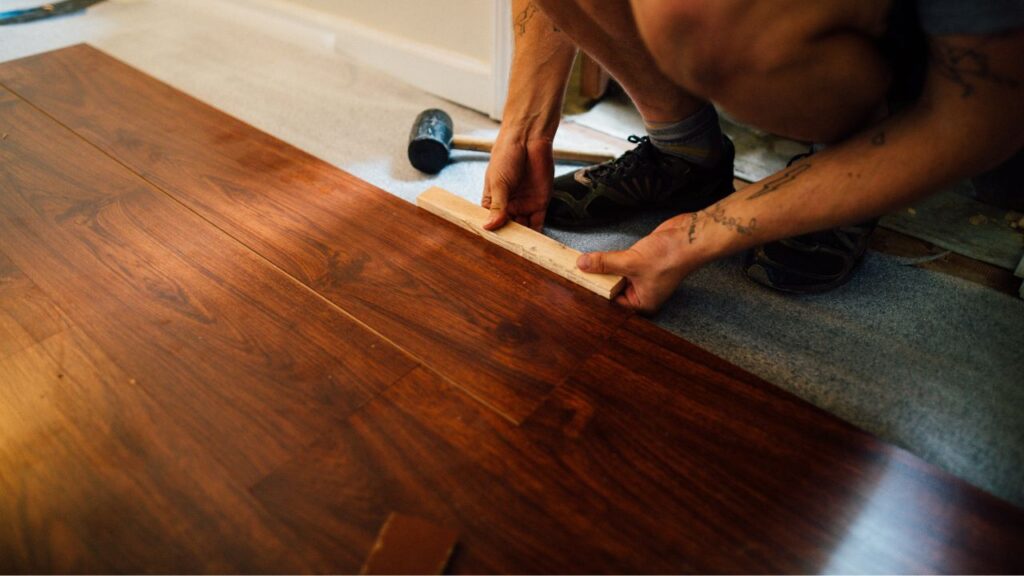
- Begin Installation: Start laying your hardwood flooring along one wall, using spacers to ensure an even gap between the boards and walls. Continue installing row by row, interlocking each piece securely.
- Cutting and Fitting: Use a miter saw or a jigsaw to cut boards as needed when reaching the edges or fitting around obstacles like door frames. Ensure precise measurements and clean cuts for a professional finish.
- Finishing Touches: Once all boards are installed, remove spacers and fill any gaps with wood filler matching your chosen hardwood. Sand the floor to achieve a smooth surface, then apply your desired finish – be it stain, varnish, or oil – following manufacturer instructions.
Flooring St George Utah: If you’re located in St George, Utah, you have access to a wide range of hardwood flooring options to choose from. Local suppliers such as insert local supplier name offer an extensive selection of high-quality materials that can help you achieve your dream hardwood floors while considering your specific needs and preferences.
Embrace Your New Hardwood Floors
Congratulations! You have successfully transformed your space by removing that old carpet and installing beautiful hardwood flooring. Enjoy the timeless elegance, durability, and warmth that your new floors bring to your home. Not only will they elevate your interior design, but they will also enhance the overall value of your property for years to come.
Remember, if you need assistance or professional guidance throughout this process, don’t hesitate to consult with flooring experts in your area. They can provide valuable advice tailored to your specific project requirements.
Also Read: